The eyes are the windows to the soul and eye makeup is a defining feature of any look. From everyday natural makeups to more intense dramatic looks, it’s important to understand methods, tools, and product selection to achieve professional looking results.
Eye makeup can bring out the shape and color of the eyes as well as providing an outlet for makeup artists to be creative, accentuate the positive, and adjust for the client’s tastes or the look of the event.
Pre-Eye Prep Skin and Lid Prep
Simple prep for easy application and extended wear:
Cleansing: Wipe off any oil or dirt (or other makeup).
Moisturize: Moisturizing is important to avoid any dryness. Use a light eye cream.
Prime: Apply an eyeshadow primer or concealer to your lids to help even out your skin tone and give the pigment something to grip onto.
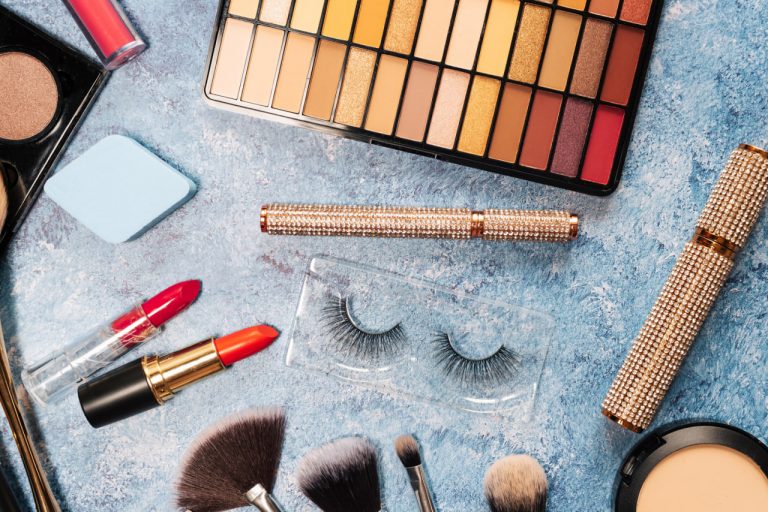
Applying eye makeup requires a few basic tools, such as an eyelash curler and a lash separator, in addition to different types of applicators. One of the most common applicators for eye shadow is a brush. There are many different types of eye shadow brushes, including a push brush, a laydown brush, and an eye sweep brush. The push brush is a small brush used to line the eyes or to create a deep crease. The laydown brush is a flat brush used to apply the base color to the eye. The eye sweep brush is large and angled, and it is used to cover the entire eye area with shadow. Other applicators include a sponge applicator, an eye shadow applicator, and a wand. The sponge applicator is used to smooth out lines or to blend colors together. The eye shadow applicator has foam applicators at each end and is used to apply shadow all over the eye area. The wand is used to apply shadow underneath the eye area. Other tools used to apply eye makeup include a lash comb, tweezers, sharpener, and pencil. The lash comb is used to detangle lashes and separate them. The tweezers are used to shape brows. The sharpener is used to sharpen eye pencils, and the pencil is used to line the eyes.
I also have a few eyeshadow brushes. Some for blending and some for packing, and some for more precise work.
Eyeliner Brushes: These are smaller and have a finer point, ideal for applying gel or cream eyeliners.
Sponges and Blenders: Great for blending and creating transitions.
Lash Tools: for curling, tweezing, and a final swipe of mascara.
Simple Daily Makeup Eyeshadow Tutorial. Natural. Everyday
Using a fluffy brush, apply a neutral base color all over the lid.
Then add a smudge of a shade a little deeper than you used on the lid to the crease for some dimension.
Blend well to remove any distinct edges.
Apply a light, shimmery shade to the brow bone and the inner corner of your eye.
Ways to Apply Eyeliner in Your Everyday Life
Tightlining: This is when you line as close to the lash line as possible to give your eyes a soft definition.
Soft Pencil Liner: Gently smudge for a soft, blended finish.
Neutral Shades: Brown or a soft black defines the eyes without looking too dark.
Finishing the Lashes
Curl your lashes, but only just before putting on your mascara.
For longer, voluminous lashes without clumping, use one to two coats.
Concentrate on the outer corners for a slight lifting impact.
Dramatic Eyes Smoky Eyes
Select a color for your lid and a second darker color for your crease and outer corner.
Easily transition between dark and light for gradient style.
Apply a highlighting color in the inner corner of the eye for some depth.
Technique: Cut Crease
Use a deeper crease color to line the lid.
Carve out the crease with concealer.
Choose a bright or metallic color for the lid to add contrast.
Feather edges to create sharp transitions.
Graphical and Pictorial Styles
Try geometric shapes, bold lines or color blocking.
If you want a more defined line, you can use gel or liquid eyeliner.
You can also add metallics, glitter or rhinestones for a more dramatic effect.
Shaping and Enhancing Your Brows Why Brows Are Important
Because eyebrows are around the eye area, they can completely transform the face. If the eyebrows are properly shaped and filled, they will look great with any eye makeup application.
Methods
Filling: Fill in the sparse spots using powder, pencil, or pomade.
Grooming: Keep the shape of your natural arches; don’t go overboard with tweezing.
Application: Apply clear or tinted brow gel to hold the hairs in place.
How to Apply Eyeliner? Pencil Eyeliners
Great for soft, natural makeup.
Smudgeable for a softer, smokier look.
Liner (liquid or gel)
Give me sharp, pointed lines.
Great for winged liner, graphic looks, and more dramatic styles.
Ideas for Placement
Simple & Subtle: If you want to enhance the natural beauty of your lashes without being too obvious, always line the shape of your natural lash line.
Then, just extend it a bit at the outer corner for that lifted and lengthened look.
To create bold fonts, try varying line weight, curves and edges.
Eye Shapes and Eye Makeup Ideas Almond Eyes.
Most versatile; works for bold styles and winged liner.
Close crease color a shade above the natural crease to create depth.
Hooded Eyes.
Use lighter colors for the creases and highlight above the fold.
If you use a thick liner, you will close off your eye, so I like to use a thin liner.
Round Eyes
Use a darker shade to enhance the outer corners to create a longer shape.
Steer clear of too much liner on the lower lash line or it can make the eye look closed off.
Deep-set eyes sit further back into your face.
Apply lighter shades on the lid to make it more prominent.
Steer clear of using too much dark shade on the crease, as this will cause the eyes to look deep-set.